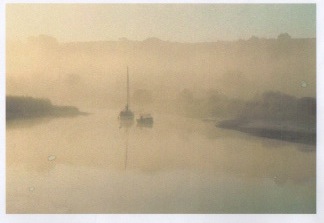
This week both beginners and improvers worked on the boats in mist painting, each of us had slightly different results, which is as desired, see the difference between my exercise below, and thew original photograph below that, this is my interpretation, however I did restrict you to phalo blue, permanent rose and cadmium yellow and cad red.
The object of today's exercise was to control the amount of water on the brush when applying pigment to get thicker or thinner brush marks as you see in this example.
For the sky and sea we did a 1st wash of pthalo blue top and bottom with a really wet brush on a very wet clear wash all over, then cleaning the brush out, we went in with a small amount of cadmium yellow on the middle, and without cleaning the brush out added a wet bad of permanent rose below the yellow, then we set it aside to dry.

Whilst it was drying, we practiced thick and thin lines again as we have done before, see below, so we could add the banks of colour on either side of the boats, darkening and mixing the colours together as we painted the banks nearest us.
The for the pink hills at the top, we painted a clear wash 2 3rds up the page and applied a pale permanent rose wash into the wet wash and then up into the dry paper so that we had a hard top edge, and a wet, soft under edge, then added a pink back embankment, then without cleaning our brushes out we added pthalo blue for one a nearer embankment and added more blue and cad red for the front embankment.
For the boats we used what was on our brushes, and almost totally dried our brushes out to paint the skinny lines needed for our masts.

The improvers went on to paint another boats in mist painting, this time the mass of colour didn't go from the right to the left edge of the painting, but was predominantly yellow / orange to the right and variations of cooler colours to the left, we need extremely wet pigment washes for this to avoid seeing any brush marks for the background.


As you can see from my demonstration of the 1st wash, 👇👇👇 this can be left open to interpretation, exactly what colours to use.
Whilst this wash was drying we practiced the band of enbankment / trees across the middle 👆👆👆wet in wet, i'e with a clear wash put down 1st and pigment applied on top of the clear wash.

One thing we all need to consolidate for both classes, is
A. how much water to add to out pigments when mixing a colour in the palette, to create the right amount of pigment flow.
B . How to keep our paintings surface water consistent during the painting process.
Some of us found that the more colours we needed to apply, the longer the process took, and whilst that was happening our painting was drying in some areas and still wet in others.
We will begin to remedy this in the next class, but to sum it up, we need work quickly and finish the painting before we are happy with the result if we see a part of it is drying, although you can extend the drying time by spraying with a fine mist sprayer, or by moving your brush around the painting rather than just working in 1 area at a time.
I showed a painting in progress film at the beginning of this class to demonstrate how the 1st wash can be very simple, and how to add layers once each wash has dried, to build up the effect you want.
Please practice what you have learned at home.

No comments:
Post a Comment